How to Clean and Reuse Your MOFT Laptop Stand
Senior Hardware Diagnostics Specialist & Lead Thermal Editor at Laptop Post Testing Lab · CompTIA A+, ACMT, B.S. in Computer Engineering · 12+ years bench-testing laptop thermal solutions & motherboard repairs
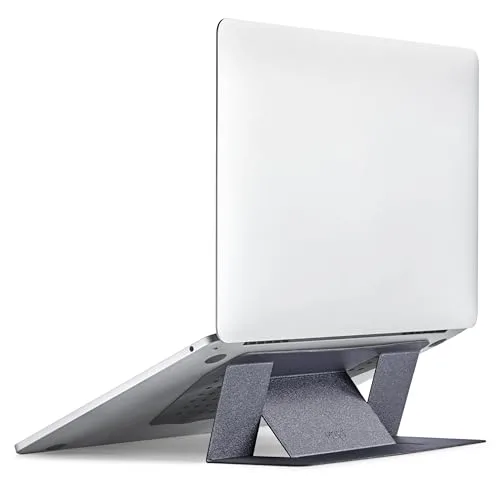
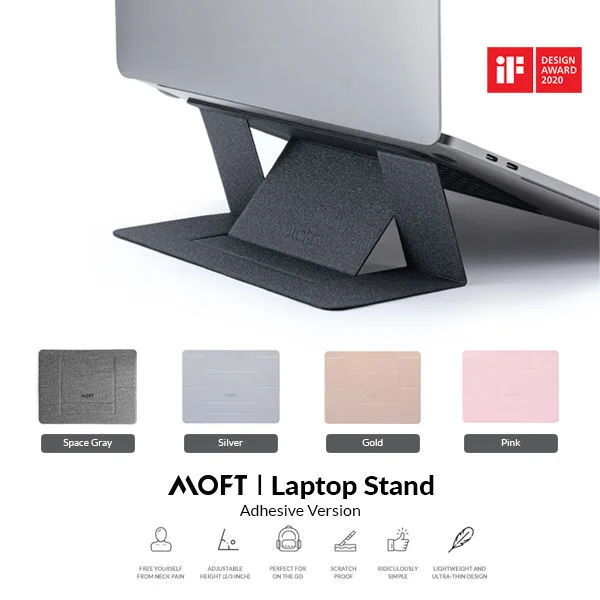
If your Moft stand is sliding or failing to stay attached to your device, knowing how to clean and reuse your Moft removable adhesive laptop stand can restore its original grip. This proprietary adhesive is designed for multiple reattachments, but it requires specific care to stay functional over time.
As of 2026, manufacturer documentation confirms that these stands utilize a specialized non-residue gel adhesive. Proper maintenance involves removing environmental debris that naturally collects on the surface. With the right technique, you can refresh the bond without damaging your laptop or the stand itself.
Quick Answer
You can restore your stand by wiping the adhesive with water. Use a damp, lint-free cloth. Do not use chemical cleaners.
Let the adhesive air dry completely before re-attaching. Keep oils and dust away from the gel.
Why Your Moft Stand Loses Its Grip
The adhesive on your stand works by creating a mechanical bond with the smooth surface of your laptop. When this bond weakens, it is usually because the gel layer has become saturated with surface-level contaminants. Dust, lint, and oils from your hands are the primary culprits that interfere with the suction-like properties of the material.
If the stand was frequently removed and left in open air, it likely collected micro-particles. These particles sit between the gel and your laptop casing. They prevent the adhesive from making a flat, uniform contact.
Even a small amount of residue can disrupt the structural integrity of the bond.
The Anatomy of Reusable Adhesive
The adhesive used on these stands is a type of synthetic, reusable gel. Unlike traditional double-sided tape, this material does not rely on a chemical bond that cures into a permanent state. Instead, it maintains a semi-tacky state that allows for repeated removal and replacement.
Because this gel is sensitive to oils, it is important to handle it sparingly. According to general National Institute of Standards and Technology (NIST) guidance on material adhesion, contaminants often degrade the surface tension required for a reliable hold. Keeping the gel clean preserves the physical properties of the adhesive layer.
How to Tell When It Is Time to Clean
You will notice the need for cleaning when the stand no longer holds the weight of your laptop at the intended angle. Other common signs include the edges starting to lift on their own or the stand shifting during use. If the adhesive feels smooth or glassy to the touch rather than tacky, it is likely coated in a layer of fine dust.
You can perform a simple check by gently pressing the adhesive against a clean, flat surface. If it slides easily, the surface is contaminated. If it resists sliding, the adhesive is still in good condition.
Step-by-Step: The Wet-Wipe Restoration Method
The goal of this process is to remove debris without stripping away the adhesive properties. You only need a clean microfiber cloth and a small amount of water.
- Peel the stand away from your laptop slowly.
- Dampen the microfiber cloth slightly with water.
- Wipe the adhesive surface using gentle, circular motions.
- Allow the stand to air dry in a dust-free environment for ten minutes.
Do not use paper towels or tissues for this step. Paper products leave behind small fibers that will stick to the gel and worsen the problem. Always wait for the surface to be completely dry before you attempt to re-attach the stand to your computer.
| Step | Action | Purpose |
|---|---|---|
| 1 | Peel | Separate stand from laptop |
| 2 | Wipe | Remove surface oils and lint |
| 3 | Dry | Restore adhesive tackiness |
| 4 | Press | Re-establish the bond |
Visual Cues: Identifying Surface Contamination
When looking at the adhesive, healthy gel should appear semi-translucent and uniform. If you see dark spots, hair, or a matte grey coating, those are visual signs of heavy contamination. A clean adhesive pad will look somewhat glossy, even after multiple uses.
If you notice a white, dusty layer, this usually indicates that the stand was left in a dry environment and picked up floating particulates. If the gel looks clear but still fails to stick, it may have a thin film of skin oil on it. A quick wipe with water will usually correct both issues.
Critical Mistakes That Kill the Adhesive
Many users accidentally destroy the stickiness of their stand by using harsh household chemicals. Alcohol-based glass cleaners and solvent-heavy degreasers break down the chemical bonds within the gel. Once this happens, the surface becomes permanently slick or develops a gummy residue that never sets properly.
Avoid using paper towels to dry the adhesive after washing. The tiny wood pulp fibers cling to the gel, creating an uneven surface that prevents a secure hold. Always reach for a clean, synthetic microfiber cloth instead.
Heat is another major risk factor to manage. Using a hair dryer to speed up the drying process can warp the plastic housing or cause the gel to lose its structural shape.
When to Use the Tape Lifting Technique
The tape method is a great shortcut when you don't have time for a full wash. Use standard masking tape or low-tack painter's tape to lift surface dust and lint from the adhesive. Simply press a clean strip onto the gel, rub it gently, and peel it away to pull the contaminants off.
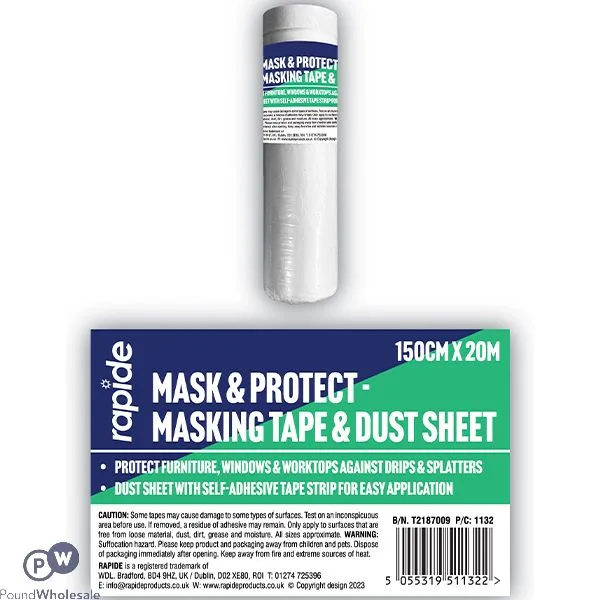
This technique works best when the adhesive is only lightly dusted. It won't remove heavy oils or dried residue, so it shouldn't replace a water-based wash indefinitely. Avoid using high-tack duct tape or heavy-duty packaging tape.
These can leave behind their own residue or tear chunks out of the soft gel layer.
Best Practices for Re-Applying Your Stand
Once the adhesive is clean and dry, the way you press it onto your laptop matters. Align the stand carefully while the laptop is lying flat on a hard surface. Start from one edge and apply steady pressure as you move across the length of the stand to avoid trapping air bubbles.
Air bubbles act as weak points where the adhesive isn't making full contact. Once the stand is placed, hold it down firmly for at least 30 seconds. This initial pressure helps the material conform to the subtle texture of your laptop casing.
After applying pressure, leave the laptop undisturbed for an hour if possible. This allows the bond to stabilize before you start adding weight or adjusting the stand.
Long-Term Maintenance for Peak Ergonomics
Keeping your workspace clean is the most effective way to extend the life of your stand. If your laptop sits on a dusty desk or inside a sleeve with debris, the adhesive will naturally attract those particles. A quick wipe of your laptop casing before re-attaching the stand keeps the gel clear.
Consider the surface of the laptop itself when choosing where to place the stand. A clean, smooth metal surface provides the best grip. If you use a protective skin or a textured cover, the adhesive has less surface area to grab.
This results in a weaker bond that will fail sooner, regardless of how clean the adhesive is.
Troubleshooting Persistent Surface Bond Failure
If your stand continues to peel after a proper cleaning, the issue may be the laptop surface rather than the adhesive. Check for residual wax, polish, or oily smudges on your laptop cover. Use a tiny amount of mild dish soap and water on the laptop surface to ensure it is completely grease-free.
Sometimes, the gel itself reaches the end of its life cycle. If the surface remains matte and lacks any tackiness even after multiple cleanings, the polymer has likely degraded. In these cases, there is no way to chemically renew it.
It is then time to accept the material has served its purpose and move on to a replacement stand.
Safety Warnings: What to Never Use
You must avoid harsh solvents that act as chemical thinners. Products like Goo Gone, acetone, and heavy-duty paint thinners are essentially designed to dissolve adhesive bonds. Using these on your stand will turn the gel into a liquid mess that can never be recovered.
Additionally, skip household glass cleaners that contain ammonia or high concentrations of alcohol. These agents strip the plasticizers from the gel, causing it to become brittle and lose its ability to conform to surfaces. Stick to plain water or a very mild, non-abrasive dish soap.
Anything stronger risks damaging both your stand and the finish of your laptop.
Frequently Asked Questions
Can I use a hair dryer to dry the adhesive faster?
No, you should never use a hair dryer or any heat source on the adhesive. High temperatures can cause the gel to warp or lose its shape entirely. Air-drying at room temperature is the only safe method.
Heat often leads to premature failure of the adhesive material.
Will dish soap leave a residue on my stand?
It can if you don't rinse it off properly. Only use a tiny drop of mild, fragrance-free soap in a bowl of water. Gently rinse the stand under cool running water after scrubbing.
This ensures no slippery soap film remains to interfere with the bond.
How many times can I remove and re-attach it?
There isn't a hard number, but most stands handle dozens of reattachments if kept clean. The adhesive life depends entirely on how much dust it collects between uses. Keep the stand covered when it's not attached to your laptop to maximize its lifespan.
Is the adhesive harmful to my laptop casing?
The adhesive is specifically formulated to be non-damaging to standard laptop materials like aluminum and high-grade plastics. It doesn't use harsh permanent bonding agents, so it won't strip paint or leave a sticky mess if removed properly. Always peel the stand off slowly at a low angle to be safe.
Why does the stand peel off in humid weather?
Humidity affects the surface tension between the gel and your laptop casing. Moisture can accumulate as a microscopic layer between the stand and the laptop. If you live in a high-humidity area, ensure both surfaces are perfectly dry before application.
Wiping your laptop with a dry cloth before re-attaching helps resolve this issue.

Similar Posts