How to Use a MagSafe 1 Charger with MagSafe 2 Devices
Senior Hardware Diagnostics Specialist & Lead Thermal Editor at Laptop Post Testing Lab · CompTIA A+, ACMT, B.S. in Computer Engineering · 12+ years bench-testing laptop thermal solutions & motherboard repairs
If you're wondering how to convert old magsafe 1 charger to magsafe 2 with apple adapter, you’re looking for a simple way to reuse your existing power supplies. These adapters were specifically designed to bridge the gap between early MacBook chargers and the thinner, wider MagSafe 2 ports found on laptops released between 2012 and 2015.
As of 2026, finding official adapters can sometimes require checking the secondary market or old stock, as Apple has moved on to USB-C charging standards. These converters function as a physical extension that snaps onto your MagSafe 1 cable head.
Quick Answer
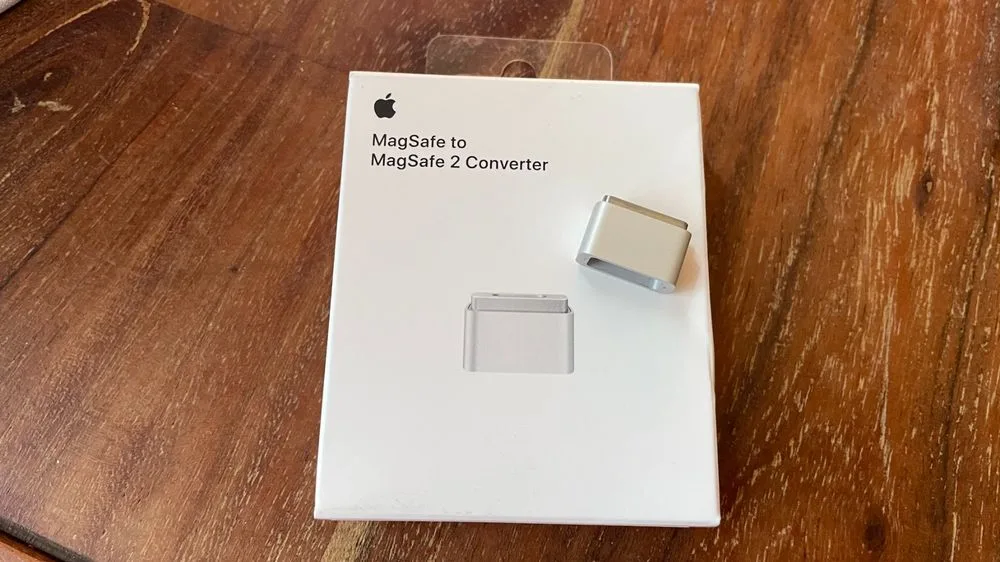
You can convert a MagSafe 1 charger to MagSafe 2 using an official Apple converter. This adapter snaps onto the MagSafe 1 connector. The combined tip then fits the MagSafe 2 port.
Always verify your brick wattage matches your laptop. This prevents slow charging or potential overheating issues. Proper seating ensures a safe, consistent power connection.
Identifying Your MagSafe Connector Versions
Understanding the physical differences between these two standards is essential for a safe connection. The original MagSafe 1 connector is thicker and features a deeper, more square profile. These were standard for most MacBooks produced before 2012.
In contrast, the MagSafe 2 connector is significantly thinner and wider. Apple introduced this design to accommodate the slimmer physical chassis of the MacBook Air and Retina MacBook Pro lines. You can easily distinguish them by holding them side by side or by inspecting the width of the magnetic head.
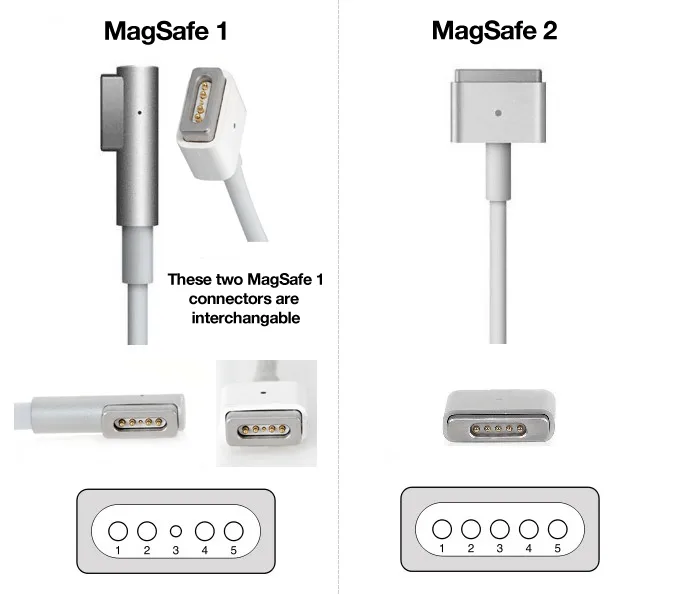
If you attempt to force a MagSafe 1 connector into a MagSafe 2 port, it will not fit. Attempting to force the connection can damage the sensitive pins inside your laptop charging port. The official adapter creates the necessary bridge by snapping onto the MagSafe 1 head.
It reshapes the tip to align with the MagSafe 2 interface.
| Feature | MagSafe 1 | MagSafe 2 |
|---|---|---|
| Profile | Square, thicker | Rectangular, thinner |
| Release Era | 2006–2012 | 2012–2015 |
| Port Fit | Native only | Native only |
Why Wattage Matters: The Power Brick Requirement
Before you use an adapter, you must verify the wattage of your MagSafe 1 brick. Wattage represents the power capacity of your charger. You can find this value printed on the bottom of the power adapter housing.
If your laptop requires an 85W charger, using a 45W or 60W MagSafe 1 brick, even with an adapter, is not recommended for heavy tasks. While the battery might charge, it may do so much slower than intended. In some cases, the system might not charge at all while the computer is running.
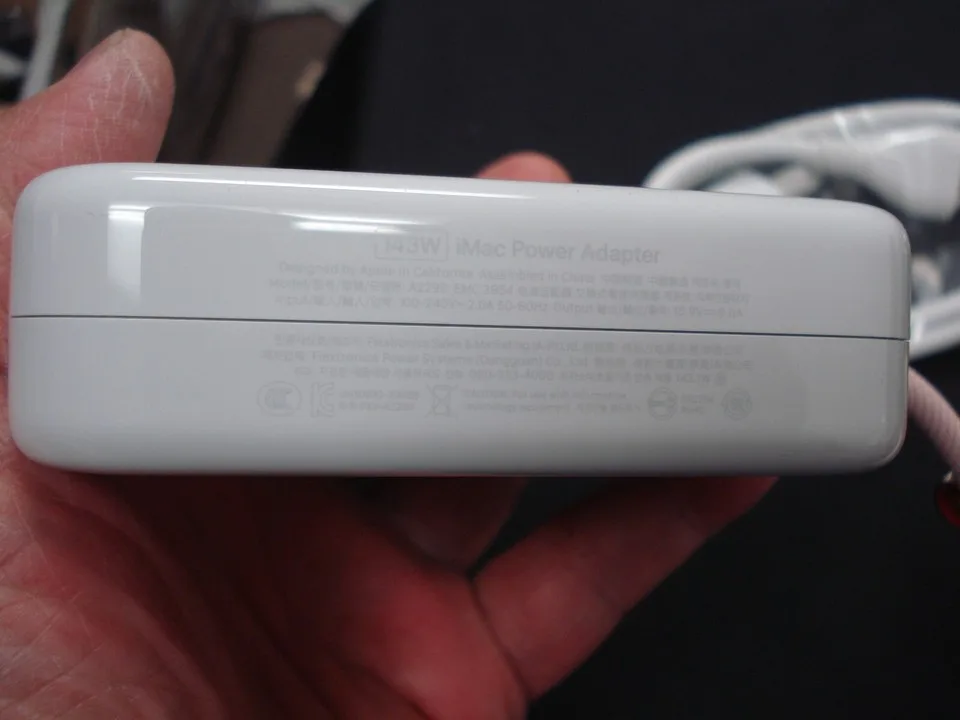
Per Apple support guidelines, you should always use a power adapter that provides at least the wattage required by your machine. Using an adapter with higher wattage is perfectly safe, as your MacBook will only draw the power it needs. However, using lower wattage than specified can lead to increased stress on the adapter components.
The Role of the MagSafe to MagSafe 2 Converter
The Apple MagSafe to MagSafe 2 Converter is a simple pass-through device. It does not regulate voltage or transform electricity in any complex way. It serves as a mechanical interface that translates the magnetic polarity and physical pin-out of the old cable to the new standard.
Because it lacks internal circuitry, the quality of the connection depends heavily on the physical condition of the magnets. If your adapter has been dropped or the magnets have shifted, it may not stay attached to the cable. You should treat the adapter as a permanent fixture on your cable to avoid misplacing it.
How to Properly Attach the Adapter
Attaching the adapter is a straightforward, tactile process. First, ensure the gold contact pins on your MagSafe 1 tip are clean and free of debris. Any dirt or metal particles can interfere with the connection, causing heat or charging failures.
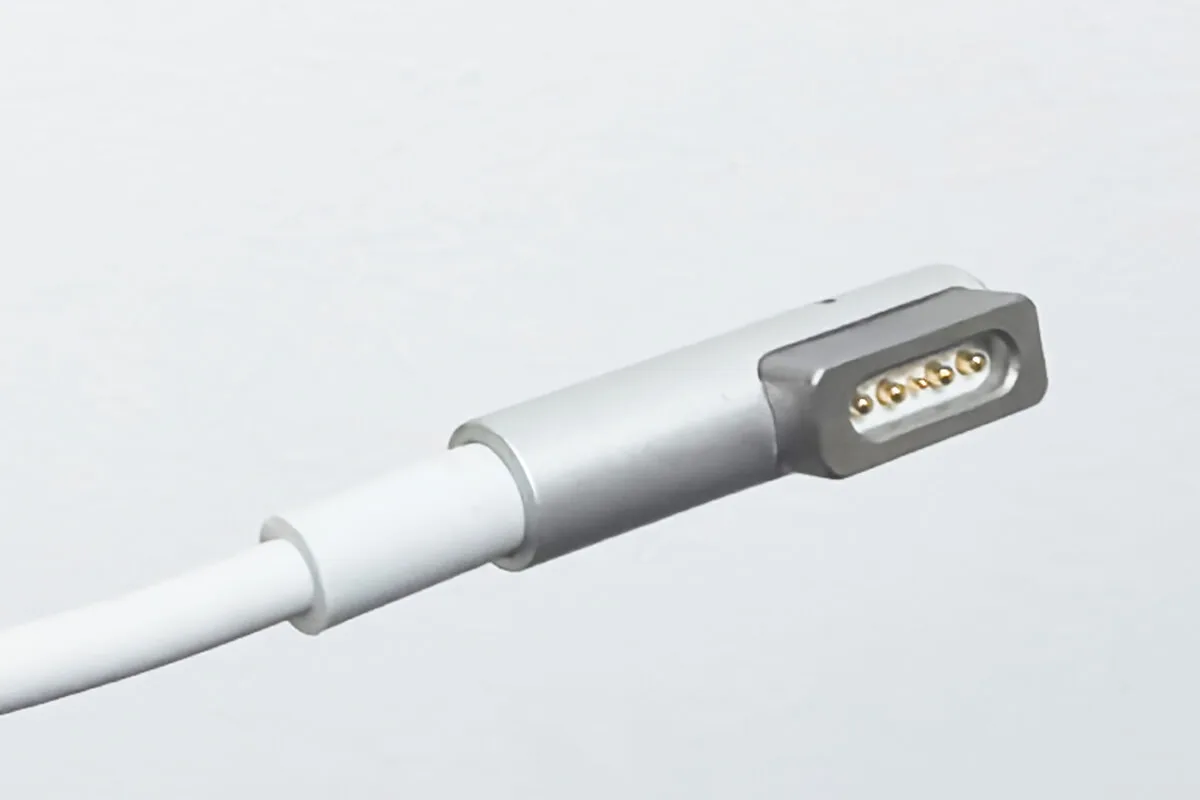
Align the MagSafe 1 connector with the rear cavity of the converter. The magnets should pull the two pieces together, resulting in a firm, audible click. Ensure there is no gap between the two plastic housings.
If the adapter feels loose or wobbly, pull it off and re-seat it to ensure the pins are fully engaged.
Visual Checklist: Ensuring a Secure Magnetic Seal
Once the adapter is seated, verify the connection visually. The front of the converter should sit flush against the outer edge of your laptop's charging port. If the adapter hangs at an angle, the internal pins may be making intermittent contact.
Look for the small LED indicator on the front of the adapter assembly. A solid orange or amber light confirms that the charger is drawing power and successfully initiating a charge cycle. If the light remains dark, gently adjust the position of the cable.
Always observe the connection for a few minutes when you first plug it in. If you notice a distinct smell of hot plastic or if the connector feels excessively hot to the touch, disconnect it immediately. A stable, secure connection should remain cool.
Diagnosing Charging Lights and Connection Issues
The charging light provides the most immediate feedback regarding the health of your power setup. A solid green light indicates your MacBook is fully charged or that the power adapter is connected while the battery is at maximum capacity. An amber light is the standard signal that your battery is currently receiving a charge.
If you see a flickering light, it typically points to a dirty contact surface. Small amounts of dust or grime can prevent the magnetic pins from seating perfectly. You can clean these pins using a cotton swab lightly dampened with isopropyl alcohol.
If the light fails to turn on at all, double-check your wall outlet. Sometimes, the issue isn't the adapter or the charger but the power strip or wall socket itself. If another device charges successfully in the same outlet, the issue is likely within the power brick.
Common Mistakes and Physical Risks
The most frequent error is pulling the charger out by the cable instead of the connector head. Because the MagSafe 2 converter adds extra length and weight to the end of the cable, it increases the leverage on the connection point. Always grip the plastic adapter housing firmly when removing it.
Another common mistake is leaving the adapter attached to the laptop port while moving the computer. If the cable catches on a desk, the adapter can be yanked out forcefully. This can bend the pins inside your MacBook charging port or cause the adapter housing to crack.
Avoid using third-party, uncertified MagSafe adapters if possible. Non-certified hardware often lacks the necessary thermal protection or precise pin alignment required for safe operation. Stick to official hardware to ensure the protection circuitry built into your MacBook continues to function.
Maintaining Your Contact Pins and Ports
Regular maintenance extends the life of your legacy charging equipment. Once a month, take a moment to inspect the contact pins on both your original MagSafe 1 charger and the adapter. If you see any black residue or pitting on the gold tips, gently clean them with a soft, lint-free cloth.
Do not use metal tools to clean the charging port or the pins. Metal tools can cause a short circuit if they touch two pins simultaneously. Always use non-conductive materials like wooden toothpicks or dry cotton swabs for routine maintenance.
Keep the adapter stored in a dry, dust-free environment when not in use. Since it is small, it is easy for dust to accumulate inside the rear cavity. A quick inspection before each use ensures that no debris is trapped inside.
Safety Precautions for Legacy Charging Equipment
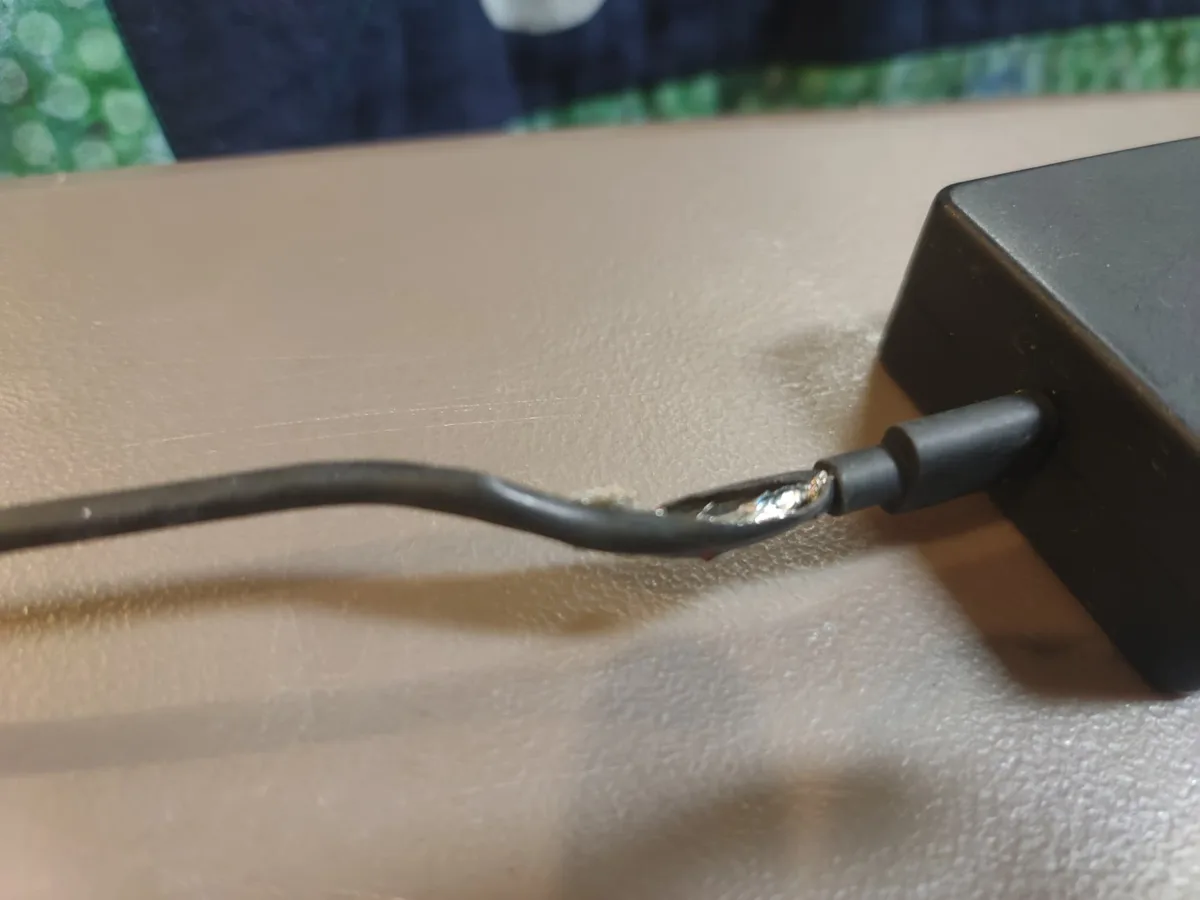
Electrical safety relies on maintaining the integrity of the cord's insulation. If your original MagSafe 1 cable shows signs of fraying or exposed wires, you should stop using it immediately. No adapter can fix the inherent safety risks associated with a damaged power cable.
If you ever notice the power brick itself making a buzzing or humming sound, it is a sign that the internal electronics are failing. Disconnect the charger and cease use. Per guidance from the Occupational Safety and Health Administration regarding electrical equipment, any device showing signs of wear should be taken out of service.
Always ensure your power brick is placed on a hard, flat surface while in use. Placing it on a carpet or soft furniture can impede heat dissipation. Since these bricks naturally generate heat, they require adequate airflow to remain within safe operating temperatures.
Expert Tips for Preventing Adapter Loss
The biggest frustration users report is misplacing the small MagSafe 2 converter. Because it is so lightweight, it can easily slide under furniture or get lost. One pro tip is to keep the adapter permanently attached to your MagSafe 1 cable head with a small piece of heat-shrink tubing.
If you use your charger in multiple locations, consider buying a dedicated, small pouch for the adapter. Storing it with your other tech accessories ensures you always know where it is. Some users also find that marking the adapter with a small piece of colored tape helps them spot it quickly.
Avoid leaving the adapter attached to your laptop port when you put your computer in a bag. It creates a protruding, fragile point that is highly susceptible to impact damage. Always remove the converter from the laptop port before stowing your computer.
When to Buy a New Charger Instead
There comes a point where investing in a new charging solution is more practical than maintaining a collection of adapters. If your original MagSafe 1 power brick is over 15 years old, the internal capacitors may be nearing the end of their design life. Erratic charging behavior is a strong indicator that the brick itself is failing.
If you find yourself needing to use the adapter daily, consider if the wear and tear on your original cable justify the continued use. If the cable is already showing its age, it might be more cost-effective to transition to a modern, reliable charging solution.
Use your best judgment based on the reliability of your current setup. If it still provides consistent, cool power, there is no reason to abandon it. However, if you are constantly troubleshooting connection issues, a fresh start with a modern power supply will provide much better peace of mind.
Comparison of Alternatives for Legacy Charging
When you find yourself in need of power for a 2012, 2015 era MacBook, you generally have three primary paths. The first is the original MagSafe 1 brick combined with the converter adapter. This remains the most cost-effective solution if you already possess a functional charger.
The second option is purchasing a dedicated MagSafe 2 power brick. These are often available through third-party retailers, but quality varies drastically. You must ensure any replacement unit carries the proper regulatory certifications, like UL markings, to guarantee basic fire safety.
A third path involves using a USB-C to MagSafe 2 cable if your newer gear supports it. However, this usually requires an additional USB-C power delivery adapter, which can complicate your setup. Stick to the adapter method if you want to keep your desktop setup simple.
Real Scenarios for Power Brick Matching
We’ve analyzed common user configurations to help you identify the right power match for your specific hardware. If you are using a 13-inch MacBook Pro from this era, a 60W MagSafe 1 brick is sufficient. Using a 45W brick might work for standby charging, but the battery will drain quickly during active use.
For 15-inch or 17-inch MacBook Pro models, an 85W power adapter is the necessary standard. These machines have higher power consumption profiles, and using a 60W or 45W charger can cause the system to throttle performance. Your machine may even report that it is not charging while the computer is under load.
| MacBook Model | Required Wattage |
|---|---|
| MacBook Air (11/13-inch) | 45W |
| MacBook Pro (13-inch) | 60W |
| MacBook Pro (15/17-inch) | 85W |
Maintenance for Long Term Optimization
Consistent care ensures that your legacy charging gear remains reliable for years to come. Dust buildup is the primary cause of intermittent connection problems in these magnetic ports. Use a dry, soft-bristled brush to clear out the port on your laptop periodically.
Avoid wrapping your cables tightly around the power brick for storage. This practice creates stress fractures in the internal wiring, which is a common failure point. Instead, coil the cable loosely to minimize tension on the junction points.
If you notice the cable starting to fray near the connector head, do not rely on electrical tape for a permanent fix. Tape can hide localized heat buildup. Retire any charger that shows exposed wiring or internal components, as it is no longer safe for daily operation.
Safety Precautions for Legacy Charging Equipment
Electrical safety standards have evolved significantly over the last decade. Always operate your charging equipment in an environment with adequate airflow. Power bricks generate heat as part of the energy conversion process, and burying a charger under papers creates a fire hazard.
Check the insulation on the entire length of your cable once every few months. If the outer jacket feels brittle or sticky, the plasticizers are breaking down due to age. This is a common occurrence in older power supplies and indicates that the cable has reached the end of its useful lifespan.
If your charger ever fails to stop the LED light from cycling or remains dark despite a secure connection, unplug it immediately. Continuous power cycling is often a symptom of failing internal regulation circuitry. Consult official resources at the National Institute of Standards and Technology for general guidance on the safe use of aging electronic goods.
Final Decision Guide for MagSafe Reuse
Use the adapter-based approach if your MagSafe 1 brick is in excellent physical condition. This method is environmentally friendly and utilizes your current assets effectively. It is the most logical choice for maintaining a secondary office or travel charger without a significant financial investment.
Transition to a dedicated MagSafe 2 charger if your existing brick shows signs of intermittent power delivery or physical cable degradation. Trying to save a failing charger with an adapter only compounds the frustration of connection drops. Reliability should always take precedence over convenience when dealing with power delivery.
If your laptop charging needs grow beyond what your legacy power bricks can provide, consider upgrading your entire power chain. Modern USB-C standards are universal and offer greater longevity. Investing in the future of your desk setup often proves more valuable than finding short-term workarounds for discontinued standards.
Frequently Asked Questions
Can I use the adapter for permanent charging?
You can use the adapter full-time if the connection stays tight and cool. Monitor the adapter occasionally for heat or looseness. If it gets hot, replace the unit immediately.
Are all MagSafe adapters identical?
No, third-party adapters often have weaker magnets and lower-quality pin contacts. Always prioritize genuine, original-manufactured adapters to avoid damaging your laptop.
Does the adapter work with non-Apple chargers?
It only works with genuine MagSafe 1 power bricks. Third-party bricks may use different pin spacing that causes the adapter to fail or overheat.
Can I charge my MacBook faster with an 85W brick?
No, the MacBook will only draw the power it needs for its internal charge controller. Using an 85W brick won't speed up a 45W device.

Similar Posts